Saturday, February 15, 2014

Folk Song Research, Anyone?

I'm a geek. I'm on mid-winter break and perusing folk song websites just because I find it fascinating. So this post is quite the jump away from the cute Valentine's activities I posted recently. I decided to add a "Folk Song Research" link section to the blog. I had this on my now defunct old website and thought some of my equally geeky folk song enthusiast friends might find some of them helpful, or at the very least, interesting.

I'm not going to comment on each site I included because that would take longer than you want to read. I'll just say some of the sites are oldies but goodies for Kodaly teachers, like Smithsonian Folkways, the Holy Names Folk song collection, or the Lomax collection that can now be found online.

Some of the others, I hope, are less familiar to you and you may find as cool as I do. Some are more academic than others, perhaps, but they have come in handy in my teaching quite often. Mama Lisa's website is great for finding kids' songs and nursery rhymes from different cultures around the world. What I liked about the Evansville folk dancers website is that they post videos of folk dances from different countries that you can watch. I love it!


Tuesday, February 11, 2014

Valentine's Activities, Anyone?

Valentine's Day is almost upon us again, so I decided to post some activities I've done this week and last week that could be used for a Valentine's theme. If you look at the Kodaly Corner blog (linked on the right...a collaborative blog I contribute to), there are some more Valentine's activities if you're interested.


I have no idea where I learned this song, but my students love it! I've been using it this week, and I plan to link it to Saint Saens Carnival of the Animals Aquarium movement and the book Swimmy. The game is simple. On the first day I discuss with the class what the name of a group of fish is (school) and why do small fish travel in large groups (to not get eaten by big things like sharks). The first time we play, I lead, walking around the room with my hands swimming like fish fins and singing the names of students in the song (in place of Suzy). Each new student joins the line behind me (hands on shoulders or just walking) until the entire class is part of the school of fish, and for the last time through the song we sing, "Oh, everyone, everyone, we love you!). My students today spontaneously started giving each other hugs. Feel the love, people.

On another day when we play, the newly called student becomes the leader and must stop at their chosen person when we sing the long "Oh" so the class knows whose name to sing. If you want to, you could have each new leader be in charge of singing the last phrase of the song as a solo to assess singing voices. After the game was over, students froze with a shark fin on their heads. I then played the half step Jaws theme at various tempos and pausing at different times. Students put the notes in their feet moving when the keyboard was playing and stopping when the music stopped until all had returned to their carpet spots. One little boy today said, "I LOVE this part!"

Either the same lesson or another lesson the same week, I use the book, Swimmy (which shows the idea of a school of fish and different predators). I usually read the book the first time with the Aquarium music as accompaniment in the background. Then on another day when I introduce the Aquarium music, I ask where they've heard the music before and students can usually tell me from the Swimmy book. I then introduce briefly the idea of the Carnival of the Animals piece in which the composer wrote small songs to represent different animals. So what animals does this song represent do you think? Then I introduce a listening map for Aquarium. Here is a simple one.


To further familiarize the class with the piece, we make our own Aquarium. Half of the student use blue scarves with partners holding opposite ends to make the water waves, (you could do green seaweed as well if you need to) and the other half use bright, colorful scarves to pretend they are the fish swimming in the aquarium. Then they switch parts and the water students become fish and vice versa. We, of course, talk about moving like the music sounds. This will lead to learning about legato (and then staccato when we move on to doing the Kangaroo).

So, you could use these activities during Valentine's week, or not. It doesn't have to be Valentine's themed.

By the way, my meyersmusic visuals website I used to have set up is now defunct, but Blogger doesn't have a good way to post full-sized visuals for you to print out and use. I'm in the process of changing the visuals website over to a Weebly website which allows me to post not just picture files, but also other document formats. Check back and you'll find some of my older blog visuals reposted to the new site soon.

Happy Valentine's Day, everyone. "Oh, Kodaly, Kodaly, we love you!"

Saturday, August 4, 2012

Music, Movement, and Herding Cats...

In about a week I will be celebrating the one year anniversary of moving from Arizona to Long Island, NY. I spent the past year as a  K-2 music sub followed by being a music curriculum writer at the same school for a few months. And then, God bless them, they decided to keep me. The charter school at which I worked is opening a 2nd campus which will copy the programs in the original school and I will be the K-1 music teacher this year. (Starts with 2 K and 2 first grade classes. A grade will be added each year till school is K-5). Students at this charter school get music every day, but to fill my schedule so I can be full-time I will also be teaching separate movement classes throughout the week.

Having no idea what my schedule will be like this year and having not seen my classroom yet (They're still renovating the space), I am both really excited and slightly anxious. How long will these movement classes be? How often? Please, God, tell me movement time will not be tacked on to the end of the already ridonkulously long 1 hour music class for the kinder and 1st grade kiddies who have the attention spans of gnats to start with! The principal says the room is really big and has lots of storage, but "big" to a principal and big to a music teacher who needs space for kids to move around without killing one another can be two completely different things.

So anyway...I have movement on my mind right now. So, I'm inspired to include some movement-oriented activities in the blog this time. Any music teacher will tell you that teaching kindergarteners at the beginning of the school year is a little akin to herding a large group of cats. So, I'm going to share some of movement activities that I often use to get the youngest students moving, and that also help teach body control and classroom management at the same time.


 BODY BEAT CARDS
One of the first things I work on with young students is their ability to stop and start any given movement, and the ability to move in their own self space without hitting those around them. Students in my classes get an assigned seat, either a square on the carpet or a velcro number on which to sit, which helps to confine the area in which they can move (feet must stay in your square or on your number). I always begin with non-locomotor movement first, of course.

I usually begin the year, and continue throughout the year, with students copying teacher beat movements and I follow the sequence by Phyllis Weikart as far as what types and difficulties of motions I use and then progress through. After much practice with simple beat movement follow the leader, I move to various other activities. I made these body beat cards- head, shoulders, clap, waist, pat, stomp- to use with my classes (Find the whole set of cards in PDF form on my web page www.meyersmusic.net, linked at the right).

These cards can be used in many ways. Before beginning I always go through the cards in order (Head to feet or feet to head, not jumping around) and ask students to show me where they would put the beat if I show them that card. Then I play recorded music with a strong beat and show one card at a time, only switching with long phrases or chunks of the song to the next card. Students may not talk throughout. I make a big joke of catching students who are in "la la Land" and don't switch movement when the card changes. On another day I instruct that we will do the same, but when students see that all cards are down, they must stop all motion and freeze like a statue until a new card is shown. Again, I joke that I "tricked" some students who don't stop immediately when cards go down, or forget to change motions when a card changes. Students are getting lots of beat practice, and learning to follow some basic conducting (stop/start, change motions with phrases).

For further challenge, on another day I ask students what would happen if I showed two cards at once, such as head AND shoulders. "Show me what you would do." Some students naturally show head, shoulders, head, shoulders. Others pat head with one hand and shoulders with the other hand. At this point I accept either movement as fine. I worry about refining movements based on Weikart's levels at a later time. Even harder, on another day I switch the order of the motions- if we went top down originally, we go bottom to top. OR I scramble the cards and warn students that I'm being "sneaky" and trying my hardest to trick them.

This seems like such a simplistic, non-locomotor movement that students might get bored. However, I have found that because one level of difficulty is added on at a time (there's something new happening), students do fine. Also, some good old music teacher acting and dramaticism and a healthy dose of "I bet I'm going to trick you!" and "You are so smart. I can't believe you did it!" go a long way in encouraging enthusiasm. If the teacher is bored or BORING, the students will react in kind.  :-)


Sunday, April 1, 2012

On your mark, get set, GO!

Lines and Spaces Relay Races is a favorite game for my students which uses the large floor staves mentioned in the previous post, and is another activity I have found that non-music substitutes can usually handle doing with classes.

For this games I split the class into 2 teams and use 2 floor staves with each team lined up behind one of the floor staves. Again, we review the lines and spaces before beginning the game. It is best if there is some space or room between the first person in each line and the bottom edge of the staves or it's not much of a relay race and isn't nearly as fun.

The first person in each team stands (by their team's line, not near the floor staff). The teacher calls out a note (such as space F, or line B) and then says, "On your mark, get set, go!" Only then can the two students run to the staff and pace their feet in the correct space or on the correct line. The team to get to the correct note first gets 2 points, and if the other team gets the answer correct they get one point. Important rule, the note you touch first is the note that counts, so if the first student to the staff stands in the wrong place, they are eliminated and can't get any points. However, if they run to the staff, don't touch the staff but stand below or beside the staff to think, and then move to the correct note, then they can earn points for their team. No one on the teams may help their runners find the answer by yelling out or pointing, or the team loses points for that turn.

For the 2nd turn of the game and all remaining turns, the student who just went stays standing by the staff until the new note is called and the teacher again says, "on your mark, get set, go" and then these students must run back to their team's line, tag the next person in line, and then that team member runs forward to their team's staff in order to find the new note...thus relay races.Winning team is the one with the most points at the end. I try to play until each students has had 2 turns if possible.

Alternate relay race...
One way to truly make it a relay race that does work is to give each team a set of cards that say the names of all of the lines and spaces on them (Line E, Space E, etc.). Have the teams spread the cards on the floor in front of their line. The teacher says "On your mark, get set, go" and the race begins. The first students picks any note card, runs to the floor staff, and places the note name on the correct line or space (helpful to put tap on cards so they don't accidentally get moved as new students run up to play). Game continues as that student runs back and tags the next person in line, who runs forward to place another note name. Students may either place a new card during their turn, OR they may run up and correct a note name that was placed incorrectly on the staff instead.

The team that has placed all of their note name cards first sits down and waits for the second team to finish. The teacher then must check to see that the first team actually named all of their notes correctly. If they did, they win. If they didn't, the teacher checks the second team's notes, and if they are correct, they win instead. If both teams have incorrect notes, both teams stand. The teacher tells them how many notes are wrong (decide if you want to tell them which notes are the wrong ones) and the race begins again with the purpose of correcting wrong notes in order to find a winner. The team that fixes wrong notes fastest then wins.

This game, as you can imagine, can get rowdy. Before you start the game decide your rules about noise and such. Sometimes I give or take points based on behavior. Or, if you don't want the rowdiness, play the first version of this game which is more controlled.


Monday, February 27, 2012


Lines and Spaces practice...on the cheap

Like my previous post, here are a few more ideas that are great practice activities but that can also be used by non-music substitute teachers.

Why pay $50 for a large floor staff out of a catalog? DON'T! Go to the dollar store and buy a white shower curtain and a roll of black electrical tape. Using a yard stick, mark off the lines for a 5 line music staff with a pencil on the shower curtain. I like to make the spaces between lines large enough for students to put their feet inside the lines. I have tiny adult feet (I wear a 5 and a half), so I always mark it larger than my own feet. I make multiples of this cheap-o floor staff because then I can do a whole class practice activity, or I can make multiple stations around the music room with these big staves.

Are you ready for it? The first of many practice activities you can do with this $2 floor staff is....bah-bah-bah-dah...THE TOSS ACROSS GAME!!!

Here are the directions:
.
•Review the names of the line and space notes on the board before playing this game. A good reminder is that the space notes spell the word, “FACE,” from the bottom to the top. To remember the line notes, a reminder is the sentence, “Every Good Boy Deserves Fudge” (the first letter of each word is the order of the line note names). If you wrote this on the board before the game, erase it before playing the game so they have to use their own brains. (Also, see the Lines and Spaces Rap found in one of my previous blog posts)
•Divide the class into 2 teams.
•One student from  team stands at the base of the staff (but their feet can’t actually touch the white plastic). The teacher names a note (such as "space E" or "line B") and the students both toss a beanbag to try to land in that space or on that line. The student(s) that lands in the correct place earns a point for their team.
•How many points they earn is dependent on how far away/how hard to land on the note they tossed is (see staves below for note names and points). If they totally miss and don’t land on a line or a space, give them one more chance to toss, but if they miss again, they lose their turn.
•If a team member tries to give clues by pointing, talks, or exhibits bad sportsmanship, the other team gets a point automatically. 
•Play until each child gets at least 2 turns to be the tosser so if they miss their first answer they get a second chance. The winning team at the end has the most points.

Another way to play this same game is this: Both students toss the beanbag without the teacher calling a note first. Whichever line or space note it lands on, that child must say the correct name of the note. If they say the correct note name, they earn points for their team. 


 More cheap-o floor staff practice activities to come soon. Have a wonderful week!


Monday, February 20, 2012

I'm BAAAAAACCCKKKK!!!!

First, I apologize profusely for my long absence in posting to this blog. I have been amazed that it continues to get views despite my long absence. Life has been a little crazy as life can sometimes be. Cross country move, finding an apartment, finding a new job, trying to help plan a national conference, and trying to finish a degree...all amongst enjoying playing tourist as well. We now live on Long Island and I teach in Manhattan. So far we've been to the Empire State Building, gone to the MET, seen a Broadway play, gone to FAO Schwartz, Times Square, Central Park...

Time to get blogging again, and substitute lesson plans have been on my mind. Probably because I have been sick often this year adjusting to the crazy schedule for my new job. So I think my next several posts will be games/activities a substitute, even a non music sub can do with classes (or can be used by you as review activities with students.

 Caught in a Spiderweb Board Game
Go to my website to download a PDF of the actual game board seen to the left, as well as all of the cards needed to play the game, a template for dice, and game pieces. If you print them all out on card stock and cut out the spiderweb cards and treble clef cards (copy 2 sided), dice (fold and tape to use), and cut out the game pieces, you can make multiple sets of this game and place each set in a large manilla envelope. I leave several sets so the sub can have small groups of students playing around the room at one time (5 or 6 kids per group max).

This is a simple game. All students roll the die to see who goes first. The first student then rolls and moves that many spaces. If he/she lands on a treble clef space, they must pick up a treble clef card and name the letter of the line or space note shown correctly. If he/she names the note correctly they get to stay on that space. If they get it incorrect, they must move back to their previous spot and the next student gets a turn. If this first student lands on a spiderweb space, then they must pick up a spiderweb card and do as the card says (which may be to move forward or back so many spaces, etc.). It is then the next student's turn. If the student lands on a blank square, they luck out because they just get to stay on that space and the next student gets a turn. The first student to make it to the finish wins the game.

More to come tomorrow...I'm on a one week mid-winter break. Yahoo! Have a great week. I know I will enjoy my time off.

Friday, January 7, 2011

This elementary choral arrangement's for you, Irene!

One of our Kodály summer course students, Irene, requested my arrangement of the folk song, "I Don't Care If the Rain Comes Down," that I mentioned in class last summer. My school's elementary choir performed this song recently, and the students had a lot of input into creating the final performance of the piece. So I thought to myself, "Self, why don't you just post in on your blog for anyone who's interested." So here it is, for everyone's use...but Irene, I dedicate this particular blog post to you, my friend. :-)

I can't claim to be the original creator of this idea, either. My friend and colleague, Audrey, presented this song and it's ostinatos to the choir in our Kodály summer course a few years ago and I liked it, so I borrowed her idea and me and my choir students added onto it to make it our own. So my thanks to Audrey, one of my favorite people in the world.


With elementary choirs I have found, true to the Kodály philosophy, that it is always best for students to internalize the folk song before they attempt reading activities or harmonization in a choral piece. My school choir included 3rd, 4th, and 5th graders and the choir was very transient, as was my school. I wanted to give them reading and part-singing opportunities, but had to be careful in how I presented it in order for them to be successful. We learned this song first by doing the associated folk dance.

Instructions: Students stand in 2 concentric circles facing a partner (one partner on the inside, one partner on the outside).
    1. "I don't care if the rain comes down," Walk on beat clockwise (partners will walk opposite directions)
    2."I'm gonna dance all day." Still walking on beat, snap 3 times low middle high to reflect melodic contour
    3."I don't care if the rain comes down," Walk on beat counterclockwise (partners still opposite direction)
    4. "I'm gonna dance all day." Still walking on beat, snap 3 times high middle low to reflect melodic contour
    5. "Hey, hey, carry me away, I'm gonna dance all day." Should be back to partner...high five high low
     on "hey, hey" One arm swing partner and trade places.       
    6. "Hey, hey, carry me away, I'm gonna dance all day." Repeat last motions and switch back to their  
      original places.
    7. On each repetition of the song, students do the same motion, however they will end up with a new
     partner each time. The 2nd time the song is sung students will pass their original partner and move to the
     next person in the circle beside their partner who will become their partner for the "hey, hey" high 5s and
     arm swings. The 3rd time the song is sung, they will pass the previous partner again and move to the next
    person in the circle and so on. Play the game until partners work their way around the circle and back to
    their original partners.

My choir students thought this game was a hoot. Switching partners proved hard for them because they kept forgetting who their last partner was, so it took some practice. They didn't mind practicing, though, because many laughs and giggles were had by all. We played the game during multiple choir rehearsals to make sure the students had internalized the song.


After the song was learned solidly, we moved on to reading the rhythm and melody of the song with solfa, then we read the rhythm and melody of ostinato 1 and practiced singing it against the song, then we read the melody and rhythm of the ostinato 2 and practiced singing it against the song, and lastly we practiced singing all three parts together, song, ostinato 1, and ostinato 2. Once they were comfortable with all of these things, and only then, did I teach them the orchestration to accompany the song with glockenspiel, alto xylophone, and bass xylophone. Go to my website to download a PDF version of the Orff arrangement I created for this song. Notice that ostinato 1 is the same as the bass xylo part and ostinato 2 is similar to the alto xylo part. I found that this helped the choir's intonation, especially as new parts were added.

Finally, as we neared concert time, the choir helped me to decide the final form for our piece. We decided we wanted a "storm" to be the introduction and coda for the piece which we created with body and unpitched percussion. The storm began quietly with sprinkles, built to heavy rain, and then thunder, and then faded away again as the Orff accompaniment began before the choir entrance. At the end of the song, the Orff accompaniment slowly faded out as the storm began, and then the storm built and faded to end the piece.
    1. Begin with wind sounds created with mouths and rubbing hands together.
    2. Move to  finger snaps and mouth pops added as it starts to sprinkle.
    3. Then to lap patting and feet stomping, and then rainsticks and shakers (each student had one)
    4.  Last add a large drum or rubber trashcan for the occasional thunder before slowly working backward  
    through the previous sounds to end the storm and begin the song.

Once we had the storm down we had to decide the actual form of the song. There are many options for this...unison singing, singing in canon, singing with one ostinato or the other or both, how to transition from one part to another, etc. My choir kids decided on this form: Storm, bass xylo part and ostinato 1 two times as an opening, add melody in to bass xylo and ostinato 1 parts, bass xylo part ostinato 1 and add ostinato 2 teo times through as a transition, sing song with both ostinato parts and full accompanient, storm. This isn't the only option, of course, so adjust to fit your students abilities.

I have found that students love creating their own arrangements of folk songs and appreciate having some say in what they will be singing rather than always performing from composed octavos. I would not do this to the exclusion of singing high quality choral octavos, but especially with a young and inexperienced choir, writing your own arrangements of folk songs is a wonderful way to control the difficulty of a piece so you can adjust to your own students' abilities. Don't be scared to try it. There are many folk songs that are age appropriate and that are easily within the ability of an elementary choir to read melodically and rhythmically. Don't want to use Orff accompaniment in a concert? Then write a piano accompaniment if you must, or even better, sing your arrangement accapella. Over the years I have chosen this route many times and have never been disappointed in the results.

The same can be done with older choirs as well, but of course, you must be careful to choose age appropriate folk songs from which to create your ostinatos and arrangements. Choose a folk song that is perhaps longer or has verses, and one which has a theme that appeals to older students, such as sea chanties, cowboy songs, or a folk song in a foreigh language. Junior high students are capable of pulling ostinatos directly out of a song to create their own arrangements for performance, and in my opinion, may learn more from that experience than from singing from an octavo all of the time. How cool would it be for your students to realize that they are musicians who are capable of not only singing someone else's arrangement or composition, but of creating their own arrangements of songs! I think too often in our classrooms students see music, school music especially, as something they can't do without the help of a teacher. We need to create opportunities in our classes to prove them wrong.

Saturday, November 6, 2010

Turkey Day is coming!

Thanksgiving is coming soon. what are YOU thankful for. I, personally, am thankful that my theory teacher is at a conference and we missed two days of theory class. Ha ha! Just kidding... So here are a few Thanksgiving-oriented activities for your classes.

If anyone knows the origin of this song, please let me know. To be honest, I can't remember from whom or where I learned it.


The next song is obviously based on the tune of Zum Gali Gali. The change in text and the accompanying plate game I learned from my good friend, Dr. Michele Paise who is now a professor at Cumberland University in Tennessee. So all kudos for this one go to her. Thanks, Michele!


Another extension could be the typical Orff idea of using word chains to create a larger rondo form. So small groups of children could create food word chains (Example: Turkey, mashed potatoes, hot biscuits, corn) to perform with body percussion and then with un-pitched percussion as small group compositions. The word chains are short, so they would have to repeat the chain at least 4 times to make it more substantial. So for instance a group could perform the chain twice with words and body percussion sounds, and then twice with only un-pitched percussion playing the rhythm of the word chain. Or they could layer in their words perhaps. One student could say and play corn over and over, then the person playing turkey could join in, then mashed potatoes, then hot biscuits. Let students be creative and come up with unique ways of performing their words chains. Don't insist that every group must do it exactly the same way. In what other subject in school can students be creative and make their own choices? The final performance would alternate singing the song with group 1 performing their word chain, then the song, then group 2 performing their word chain, and so on.

Have a great week!

Wednesday, October 27, 2010

Halloween....oooooooooooooooo!

Sorry it's been a long dry spell from me with the blogging thing. As some of you my or may not know, after many years of teaching full-time and going to grad school part-time, this year I have become a full-time graduate student at Arizona State University to finish my doctorate.  October was my month 'O travel, too. I've been in Minneapolis, Fresno, and Denver in the last month. So, Travel + Grad school = no blogging from me for a while. Sorry about that!!! I promise to post more often when I catch a few minutes between theory homework and philosophical readings. Foucault, Marx, and Green, Oh, my!

I'm back just in time for Halloween, one of my favorite holidays of the year. Why, you ask? Because my birthday is in October and I have fond memories of having Halloween-themed birthday parties as a kid. So here's a few Halloween activities for your classroom this week...or next year, since I'm late. :-) As usual, I'll put the visuals on my meyersmusic.net website linked at the right.

Miss White Had a Fright


I tend to stretch using a song or chant over several classes, but if you prefer not to, you are the queen or king high poobah of your own music class. So, I'm just sharing the steps I take over several lessons below.

Lesson 1: Class echoes the poem by phrases using different silly voices. While they echo a student draws a ghost song on the board. The class then sirens the picture drawn. Add instrument parts such as rhythm sticks play the rhythms of the words throughout, while drums play all of the words that rhyme with "White" and triangles play all of the words that rhyme with "ghost." Practice saying it with the chant, and playing it without saying the words, etc.


Lesson 2: Review the poem. Say the poem with different voices, and as they say it, they make “ghost songs” with their pipe cleaners. At the end of the poem, all sing their ghost songs together. After they’ve had some practice, individual kids can sing their songs for you. (Good assessment of understanding high and low and using the head voice) and they can make "ghost compositions by combining their pipe cleaner shapes with those of other students.

Lesson 3: Kindergarteners find the rhythms with the ghost icons. 1st graders transfer this to tas and ti-tis.


Lesson 4: Students get baggies with the icons or ta ti-ti patterns and they must show you they can put them in the correct order to fit the chant.

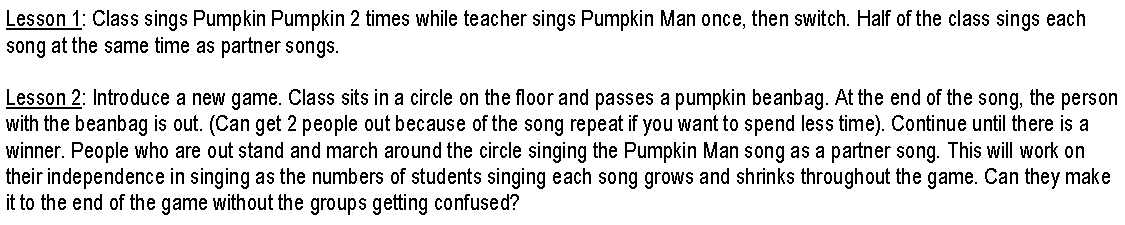
Pumpkin, Pumpkin and Pumpkin Man

OK. Here's something for older students, although you can use the song Pumpkin Pumpkin with younger students, the combination of these two songs is really more appropriate for older students.


If you want another extension on this game, you can have students switch which of the two songs they are singing when the teacher hits a hand drum. Or, have students switch from singing the words of the song to saying the rhythms of the song when the teacher hits a drum...or switch to melodic solfa. Students switch back to words again when the drum is hit again. Very challenging!
 
I hope you try these activities and find them successful. Happy Halloween, everyone! May your students nots come to school next week hopped up on Halloween candy. ;-)
Pumpkin, Pumpkin

Lesson 1: Learn the song and game. Stand in a single circle facing a partner who is beside you. Pat clap pat clap pat clap out on, “Pumpkin, pumpkin, round and fat.” Grab hands and switch places with partner on, “Turn into a jackolantern.” Jump and turn backwards to face a new partner on the word, “that.” Continue the game until you make it back to your first partner.

Lesson 2: Use the song to practice tika-tika rhythms in 2nd grade or older students for review once they know the song well.

Lesson 3: Use the song to practice d m d m d m s (notice, the hand clap movements mirror the melodic contour). Older students can use the song for fa.

Sunday, June 13, 2010

Ah! Summer...

I know it has been a while since I have had a chance to post. Sorry! Here in Arizona the school year has ended and we are a few weeks into summer. Yahoo! In the weeks since my last blog post I have had my end of the year school concerts, entered 650 grades into the computer, gotten strep throat and a sinus infection simultaneously, and packed up my entire classroom and dragged it home and into a storage unit. It's amazing how much teaching "stuff" one accumulates over the years. Now we are heading into the second week of the summer Kodaly levels course here at Arizona State University.

To make up for leaving you high and dry for several weeks, if you follow the link to the right to get to my meyersmusic website, you will be rewarded with a plethora of visuals to peruse in the next few weeks. I am beginning to post visuals and activities we have used in the summer course at ASU with our level I and II students so they have easy access to them and we don't kill a small forest printing everything out for them. Keep checking back in the next week or two because I will continue to add things in as we use them in class and I realize I haven't posted particular items yet. I'm not going to bother with directions here on the blog because I attached directions to each set of these visuals on the website already.

For those of you already on summer vacation, I hope it is wonderful and relaxing. For those of you still in school, may the coming weeks fly by and the joys of summer find you quickly. Take care!

Sunday, April 11, 2010

A musical challenge, tap your head and rub your belly...

OK, so most of you have probably seen a version of this activity if you have taught in a Kodaly-inspired general music class for any length of time. Still I am always amazed when I present clinics that there are teachers who have never seen activities that I thought were old standards, or that I somehow have put a Liza-esque twist on it that they have never seen. Or perhaps if you have done this activity exactly as I have written it, you will at least enjoy the fancy-schmantz visuals I have included for your use. :-)


Beat/Rhythm Puppets: Students pat the beat or clap the rhythm of a known song following the sign that the teacher shows (or you could have a student leader). Change in easier places, like the ends of a line or phrase with younger students. Change in more difficult places, like in the middle of a line or phrase, or switch more quickly back and forth for older students.

Sing/Think (Inner Hear) Puppets: Students follow the signs to either sing a song phrase out loud, or put it inside their heads and think the words. When the sing sign is shown again, the class must come in singing at the correct spot in the song. Change difficulty based on age and ability as suggested above.

Combining the Beat/Rhythm and Sing/Think Puppets: For an added level of difficulty put the Beat/Rhythm on one hand and the Sing/Think on the other hand. Students must then follow both plates at the same time no matter what combination is showing. For instance, they may have to sing and pat the beat, sing and clap the rhythm, inner hear and pat the beat, inner hear and clap the rhythm, etc.


Words and Solfa(do re mi)/Rhythm Syllables (ta ti-ti) Puppet: With younger students you may want to perform the two cards seperately so that they switch between the words of a known song and the rhythm perhaps on one day. On another day you may have them switch between the words of a known song and the solfa syllables.

After practicing these seperately as you do with the younger students, older students should be capable of doing all 3, switching between the words and either the solfa or rhythm syllables. To do this, you may want to create a seperate set of puppets so that one hand holds a sign that ONLY says words, and the other hand has a sign that has the rhythm syllables on one side and the solfa on the other side. This will save your sanity. But if you want to, you can use the puppets as is, you just have to remember which hand is showing which direction and only show one hand at a time.


EXTREME MUSIC CHALLENGE: To really mess with their minds, combine all of the puppets above for interesting combinations like pat the beat and say the melodic solfa, or clap the rhythm and say the rhythmic solfa, etc. I have done it with adults and children, and it is possible, but you have to think it though.

I usually pick two very smart students to help me challenge the class by being the holders of the puppets. Have student A hold the beat/rhythm puppet on one hand and the sing/think puppet on the other hand. Have student B hold the words puppet on one hand and the rhythm (ta ti-ti)/solfa (do re mi) puppet on the other hand. Then I instruct these students that I will be controlling which hand they are to turn and when by tapping them on the shoulder when I want them to flip the sign that they have in that hand. (student B must also know to put down the words sign when using the rhythm/solfa and vice versa). I then stand behind these two students in order to tap their shoulders more easily. When using all of the cards, you REALLY need to choose a song they know very well, and you need to choose a song that is long or has multiple verses. I have used it with Rocky Mountain, which has 3 verses plus the chorus each time, and it worked out.

That's about as clear as mud, I know. It's so much easier to demonstrate this than to try to clearly put it into words! Experiement on your own and you will find out what works for you. Don't forget to start easier even with older students who haven't done this before and work your way up to the harder challenges. Too many times teachers try an activity, it bombs, and they never do it again because they think it won't work, when in reality the teacher hasn't gone through all of the necessary steps and practice for their students to be successful with a difficult activity. When I find something not working in a lesson, I almost always realize it's my fault one way or another. Instead of scrapping the activity, I go back and find out what I need to do to better prepare the students to succeed.

My kids love challenges and are thrilled when they can pull of something tricky. I hope yours will enjoy these activities, too. Go to the meyersmusic.net website to download a PDF with all of the visuals for this activity. All you need to do is print each page out on cardstock, cut each pace in half and staple the two halves together all around the top and two sides of the paper. Leave the bottom of the paper unstapled because you can then stick your hand into the "puppet."

Sunday, April 4, 2010

See the Rabbit Running...

Ok. So I figured you might want a bunny song appropriate for older kids, so here goes...My older students love the game that goes with the song, "See the Rabbit Running." Pedagogically I use this song  for low la since it only appears one time at the very end of the song.

Have the students stand in a circle and hold hands. One child (rabbit) stands in the middle. Another child (fox) stands on the outside. As the song is sung the “trees,” or students in the circle, decide if they will open or close their branches at the end of the song. At the end of the song the fox chases the rabbit. They may go around the circle when chasing, or they may cut through the middle of the circle as long as they only duck under arms that are raised. Remind the students in the circle that once the song is over and they choose to put their arms either up or down, they may not change their arms until the reace is over. This will prevent a student from getting clothes-lined by accident. The fox takes over as the rabbit if he catches the rabbit. The rabbit takes over as the fox if he doesn’t get caught. I usually give a 10 second countdown for the chase and no more. The rabbit is considered safe if not caught by the end of this time. After the students know the song well enough to sing the song well independently of the teacher, then the song can be used for low la.

I have a small-ish music room, but all of my furniture is against walls, so we are able to play this chase game without too many problems. If you have no movement space, consider taking your class out into the beautiful spring weather to play the game. Or, I have seen a similar song/game in which the game involved the fox and rabbit having to weave in and out of the windows without skipping any of the windows, and the first one back to their original spot in the circle wins the round of the game. This might be a good alternative if you have little room. Have fun!


Saturday, April 3, 2010

Hop, hop, hop...

Spring is here and the weather in Arizona is gorgeous! For those of you that can use holiday-oriented song material in your schools, I thought you might enjoy this song and related activities for your classroom.


Despite this song having the descending sfmrd pattern, the lyrics are obviously most appropriate for younger grades. I use this song with kindergarteners for melodic contour (the first 2 and last 2 measures of the song) and for beat and rhythm with both movement and with icons. In first grade the song can be used for ta, ti-ti, rest rhythms.

To help the students learn the song, I created a few different activities. Students can play a hide and seek game using those brightly colored plastic Easter eggs that can be found at the dollar store on the cheap. Have all students hide their eyes and sing the song (the teacher can sing the first several times until the kids learn the song), and the teacher hides 4 or 5 eggs in the room. When the song is over, have all students open their eyes and search the room for the hidden eggs. The students who find the hidden eggs then get to hide the eggs before the next round of the game. I know this seems like an amazingly simple game, but the kids really love finding hiding places for the eggs.

On another day, have students hop on the beat, but on the rests they wiggle their bunny ears (fingers at head) to show where the rests are. You can also have them practice hopping the rhythm of the words rather than the beat if you would like. You can use the bunny and egg icons to show the rhythm of the song. (ta=single bunny, ti-ti=double bunnies, rest=egg) Go to my meyersmusic website linked at the right to download these icons.

I often pair this song at a later time with first grades with color word chains. Give partners of small groups of students Easter eggs and tell them they must decide the color of eggs the Easter bunny will leave, but that they can only choose 4 colors. Have them put the eggs on the floor in a line in the order they want the words to appear. Have the class sing the song and then have 3 or 4 groups say and clap their color word chain. Have each group figure out what the rhythm of their words would be. For example, red, yellow, purple, blue would be ta, ti-ti,  ti-ti, ta. Pick a color word chain to use as an ostinato against the song.

If older students learned this song when they were younger and you have had them in music for several years, you can bring this song back for fa ascending and descending in 4th and 5th grade. Then you can extend the color word chain activity into a rondo activity would be good for the older students.

Happy Easter, everyone! Now hand me my chocolate bunny. Yum!


Saturday, March 6, 2010

Sight-reading made fast and easy...

Hi, everyone. As we approach spring break (here in Arizona, at least, where the weather is already quite spring-like) life has gotten busy. So, since I missed posting last week, I'm going to do two entries this week to make up for it. Visuals have been on my mind this week because I just had a Promethean board installed in my music room on Tuesday, which excites me more than you know. I'm just beginning to learn how to use the thing, but can envision how much easier it will be to keep visuals and manipulatives visually on a laptop. Yahoo. Too bad we got the boards about 2 months before the end of the school year.

My 4th graders are moving right along learning how to play their recorders, but every year I get frustrated by the students who simply memorize the songs instead of truly learning how to read the notes. If we practice the song enough times in class, they can memorize the sound of the song and the matching fingerings for that song, but are at a complete loss when a new song appears in front of them. So, every year I think about new ideas or new ways to get them to practice sight-reading. This year I have been using a set of recorder sight reading cards that I can adjust for difficulty and tone set by using velcro (or in my case, now, by using the Promethean board). Maybe this idea will be helpful to you as well.

♫ Go to the meyersmusic.net website linked at the right of this block and download my sight reading card templates. I wanted a short sight-reading time to begin almost every music class, but don't want it to take up very music class time, so I only chose to make 12 rhythm cards. As you can see, you can print out the rhythm pages on card stock and then cut the rhythm cards in half (2 cards per page). Then print out the letter name pages and cut the individual letters apart.

♫ Buy some stick on velcro, or the stick on velcro dots. On the rhythm cards put a piece of velcro underneath every note of the rhythm card (use the rough part of the velcro). On every letter name card put a piece of velcro (use the soft part of the velcro).

♫ When beginning with students, place only one letter name at the beginning of each card, so if the first card says B, they will play the entire rhythm card on the note B. Give them some think time between each card to determine the correct note and fingering before the class plays. Each time they come to class and they read through these cards, swap around which note is played for which card so they can’t simply memorize the cards like many of them try to memorize the songs.


♫ If they get very good at doing this simpler sight-reading activity, then challenge them by having one rhythm card using 2 different pitches on it, then 3, then 4. You can make use of whatever tone set they happen to be working on, so start with BAG at first, and add in other new notes as they progress. You can always add in more difficult rhythm patterns as well if these become too familiar for them.

♫ If you have access to it, I make all of my rhythmic things for visuals using Finale. The newer versions of Finale have a graphics tool that allows you to create music, click on the graphics tool, put a box around the music you want to save, and then it lets you save it as a tiff picture file. I am then able to take these tiffs of individual rhythmic notes, rhythmic patterns, songs, etc., and put them into Publisher to make worksheets and visuals easily.

Try the sight-reading with your students and let me know how it goes. If you discover anything that makes it work better in your classes, or you have any great additions, let me know! Have a great weekend. Spring break, here we come!

♫ Using the velcro letters means that you can use whatever tone set they currently are working on (BAG, BAGED, BAG C’D’) and you can increase or decrease the difficulty as needed.

Sunday, February 14, 2010

Heartbeat cards and rhythms..not just for Valentine's Day.

I happened to think of posting these visuals because it's Valentine's Day. Heartbeat cards. You know. But, unlike the last lesson idea, the heartbeat cards and the rhythms that go with them can be used throughout the school year and with any grade from first up, so I thought you might find them handy. Putting them together yourself can be a bit of a pain, so I saved you the time and effort and just gave them to you already formatted.

Take note...If you use cardstock of whatever colors you choose, you can print the whole rhythm pack out on your computer on cardstock, or if your school's Xerox machine allows for cardstock you can print multiple pages out there, which saves your in in your home printer. When cutting the heartbeat cards apart, just cut the page of cardstock down the center lengthwise so there is a line of 4 hearts on each of the 2 resulting cards. When cutting the rhythm cards apart, be careful!!! The idea is that each rhythm card will take up the same amount of beats/hearts as the note requires. So a ta quarter note is the width of one of the hearts, the syncopah is the width of two hearts, the dotted half is the width of three hearts, and so on. I think you catch my drift. The easiest way to do this is to carefully cut them apart using one of those big choppers they tend to have in schools. I have no idea what they are technically called.

The heartbeat cards and rhythm cards can be used many different ways. Students each have their own 4 beat heart card and the necessary rhythm cards you will be using depending on their grade level and what you have covered in music class, or for younger grades, you could have partners work together.

1. One way I use these manipulatives are to have students figure out the rhythms of a song they already know well. Students will have to figure out how many beats the song is and how many phrases total. (As an example: Snail Snail is 8 beats long and two phrases). As we sing and clap the song, they place the cards they think match the rhythms of the song underneath the heartbeat card (first phrase right under the hearts, next phrase under the first phrase, etc.) Make sure you have them check their answers by singing and touching the rhythms to check for correctness. Younger students will take longer to do this, of course, or older students who are figuring out a longer and more difficult song will need more repetitions of the song to complete their answers. When finished, have the whole class say the rhythm solfa together to check their answers.

2. These visuals can also be used for rhythm dictation in which the teacher claps a 4 beat rhythm and the students "write" it with the cards.

3. They can be used as a means of composing with rhythms, with students creating their own 4 beat rhythm patterns. They can either create multiple patterns to make their own song, or they can combine their rhythm with that of other classmates to create a longer song. Have students perform their rhythm compositions with unpitched percussion, or later add melody to create a complete song.

4. They can also be used to teach older students about meter. My students have found them a great visual reminder of the difference in meters. The heartbeat cards I have given you are for 4/4 meter. You can create other heartbeat cards for other meters, such as a strip of 3 hearts to show 3/4 meter, or 2 hearts to show 2/4 or 6/8 meter. If you stick with duple meters like 4/4, 3/4, or 2/4, the rhythms I gave you will work. Obviously, if you decide to branch our into triple meters, like 6/8 or 9/8, you will have to create some new rhythm cards that fit with triple meter rhythms.

I usually put together sets of heartbeat cards and rhythms in gallon size bags. I adjust what rhythms are in the bags based on the grade that will use them. I hope you find this as useful as I do. To download the heartbeat cards and rhythm pages you can print out on cardstock and cut out, please go to the meyersmusic.net website linked on the right. Hope you all had a wonderful Valentine's Day!

Sunday, January 31, 2010

February, the month of love....ah!

Valentine's is fast approaching, so I thought you might enjoy some "love"ly activities for use in your classroom. I hope you find something your students will enjoy.


I use this simple rhyme with kinder and first graders, and alter the game and activity for the students' age and ability. With kinders I often play a counting out type of game with them in which I walk around the outside of a standing circle and I tap students on the shoulder to the beat. The student who is tapped on "you" is eliminated and must leave the circle, choose an unpitched percussion instrument I have set out, and play it during the rest of the game. You may choose to have all students play the beat, all play the rhythm of the chant, or allow them to choose to play either the beat or the rhythm (if I choose this option, then I have 2 types of instruments available, such as hand drums for the beat and rhythm sticks for the rhythm). Play the game until all but one are eliminated if time permits. End with all students practicing the beat and rhythm on their instruments.

On another day in kindergarten, after they know the rhyme and have played the game, we use icons with single hearts, double hearts, and lips to make patterns. The first time I do this, it is a whole class activity in which the chant is said while one child makes a 4 beat pattern on the board, and then the class "reads" the pattern using the word hug for the single heart, kiss-es for the double hearts, and a silent hand kiss (think the motion you make when you blow a kiss) for the lips. We cycle through several different students making patterns for the class to read. On another day for a greater challenge, I give each kindergartener a baggie that has single and double heart  and lip icons and each child is asked to make their own four beat pattern using the icons. We then go around the room and alternate saying the chant and having individual students read us their patterns using "hugs," "kisses," and silent blowing kisses. I can then asses which students are able to correctly create 4 beat patterns and read their patterns. At this point, I have found that a few students still have problems remembering to read from left to right, but because I have done a lot of icon work throughout the year, there aren't too many problems.

In first grade I play a similar elimination game, but at this point in the year, students are generally able to pass an object to the beat with some accuracy if we practice a bit first. If I have a particular class having problems, I will play the beat on a hand drum at first to help them. I just use a squishy, fuzzy pink ball as the object we pass, and eliminated students again play an instrument as the game progresses. You can also use the above kinder activity using icon patterns with first graders as a review. By February, my first graders have learned quarter note, eight notes, and quarter rest, but if yours have not, you can still use this chant. After students have played the game and perhaps mades some 4 beat patterns with the icons, on another day I will have them help me put the icons in the correct order to fit the rhythmic phrases of the song. They then tell me what the icons represent. One heart is ta, two hearts is ti-ti, and the lips are the rest (because cause we do the motion for blowing a kiss but make no noise). Or instead of having the class figure out the rhythms for the song together, you could give pairs of students baggies containing the rhythmic phrases and they have to put them in order to fit the chant themselves, and we check the answers as a class.

A further extension for first grade or older would be to create a rhythmic ostinato using the icons and the words that go with them, "hugs," "kisses," and the silent blown kisses, then have the class perform the chant with the ostinato.

Color and black and white icon visuals of the double heart, single heart, and lip cards can be found in color or black and white on the meyersmusic.com website linked to the right.

OK. Gotta run. Dinner time.

Sunday, January 24, 2010

"My Little Sister Ate One Hare" by Bill Grossman ISBN 0-517-88576-X


I use a lot of children's literature in my music classes, and am regularly spotted in the kids section of our local Half Priced Book store, or Bookman's perusing the shelves for books that can be used not only to teach musical concepts, but books that grab the attention and interest of my students. This book is definitely one of them. It has a mild gross out factor that will appeal to your boys, and has humorous illustrations with details that can easily be missed if you fly through the pages. My students, as a matter of fact, are the ones who began to point out things in the book's illustrations that I, as the adult, had completely missed. Ah, to have the mind of a child again. I decided to use this book for my 3rd graders because of the aforementioned gross out factor my 3rd grade boys would love, and because the activities I envisioned would be difficult for younger children, but it could be used in other grades if you so choose. You will find all of the visuals for the following activities by going to my meyersmusic website which has a link on the right hand side of this page. Ostinati and illustrations for the visuals I came up with and drew myself. My drawings of shrews aren't stellar, but honestly, how often do you have call to draw a shrew during your lifetime?! I'm going to walk you through the sequence of activities I used for this book, as well as give you suggestions on extensions that could be added, or other approaches that could be used.

The first time I introduced this book to my class, we first started with a short book walk-through in which we looked at some of the pictures, discussed what the class noticed of interest, and made predictions about what would happen at the end of the story (I didn't show the last page). Then, we read the book with the class joining in on the repetitive words, "We thought she'd throw up then and there, but she didn't." The reaction you get when we reach the last page is always entertaining.

Another lesson I pulled out the book again and told the class we would be adding instrument parts to the story. I asked them if they could predict what we would do with the instruments. Correctly, they guessed that there would be a different instrument for each creature the sister ate, and that at the end of the book when she really did throw up, all of the instruments would play at one time. It was then that I showed them the visuals with the words of the ostinati I had created for each creature and we chanted them as a class. We then split the class to cover each creature's part and chose instruments, then practiced each ostinato both saying the words and only playing the instruments with no words. Last, we did a final performance of the book with each instrument part playing only when their creature first appears in the story (I gave a "one, two, ready, play" cue each time, and each ostinati was repeated 4 times), and then all ostinati playing at the end of the book together. In one class I had to remind students to play their correct ostinati at the end of the book and not just random noises.

The next class I again put the visuals with the words for the ostinati on the board, but beside them I placed the visuals with the music notation for each ostinati, but I had scrambled the order so the rhythms didn't line up with the correct words. The class said each ostinati and then placed the rhythmic notation for each ostinati beside it. Last, we read each ostinati followed by the rhythm solfa for each to check our answers. My 3rd graders at this time had just learned syncopah, which is why I chose the "Bats in the belfry" ostinato.

Because my purpose in creating this activity was to review specific rhythms (ta, titi, rest, tikatika, syncopah) I decided in this lesson to create the ostinati myself. Another option would be to divide the class into groups and allow them to come up with their own ostinati for each creature, and perhaps to add creative movement for their chosen creature as well.

I hope your students enjoy this book as much as mine did! Have a great week. :-)

Sunday, January 17, 2010

Lines and Spaces Rap and Game

In my own classroom, my students begin learning to read and use rhythmic solfege and simple melodic solfege in first grade. They aren't introduced to absolute note names (letter names) until about 3rd grade, when they have mastered at least do pentatonic (d r m  sl), and from then on they learn to read notation flipping back and forth between solfa and letter names.

Here's an idea for helping your older students review the letter names of the notes on the staff. First, teach them the chant below with a pat-clap-pat-clap beat throughout (except the first line in which you clap only on the Xs shown). Of course, show the lines and spaces on the staff to the students. This chant is attributed to Tara Kissane, my wonderful Fine Arts Coordinator, who gave me permission to make use of her chant.

Can Do X X, Can Do X X,
FACE in a space, FACE in a space,
Every Good Boy Does Fine on a line,
Start at the bottom and now you've got 'em.

Once the students can say it independently to the beat, play this simple passing game for repetition and memory of the chant. Have the class sit in a circle on the floor with each student pretending to glue his/her left hand palm up to his/her own left knee. Practice saying, "grab, pass, grab, pass," while making a passing motion (grab out of your own upturned left hand and pass into the upturned left hand of your neighbor to the right). Continue this motion as all say the chant (I usually remove the first phrase while learning the beat passing). Try the motions with one actual beanbag moving around the circle. I often begin every repetition of the chant with saying and doing, "grab, pass, grab, pass, grab, pass, grab pass." All students do the grab pass motions throughout.

Once this is solid and students are successfully staying on the beat, begin the game in which the last child holding the beanbag is out and must sit to the side. For a challenge, if students are able to stay on the beat, I begin to add multiple beanbags into the circle so more students are eliminated each time. Once the number of students is large enough, we also begin playing the game in the 2nd circle, and sometimes even make it to a 3rd circle playing simultaneously. Once the students are able, I add back in the first phrase, which is more difficult because it requires students to do the claps and then immediately glue their left hand back down to begin passing.

If you want to print out visuals for this activity, the chant, the lines and spaces on the staff, and note name flashcards, go to the meyersmusic website in the links at the right hand side of this page.